CLICK HERE FOR THOUSANDS OF FREE BLOGGER TEMPLATES »

Saturday, October 11, 2008

Its been few weeks, but porgress!

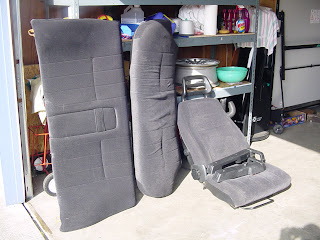
I felt like I was not getting anywhere so I put the rear interior in. Just doing that made big difference in motivation.


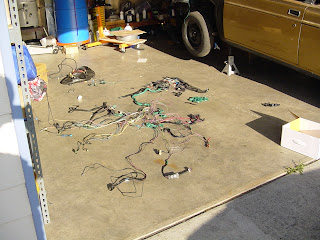
I know it looks like a rats nest now, but I have gotten some progress. ECM mounted, fuse blocks and I know where I am going to mount the 2 stage rev limiter now.


Also hooked the ground wire up for the motor. Last time I had a large sheet metal screw I used bolt this time with a aircraft nut. I ground down to raw metal and then after it was bolted down I clear coated it.


Took me a while to figure out what I wanted to do with the starter relay. I ended up putting it in same area that I had on my last car. It still looks clean, and that's what I am looking for.


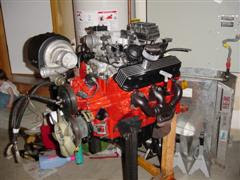
If you look at the engine, the wire harness is not on top of the motor. I extended the harness 4ft or so to run it down the front and under the alternator. The power steering reservoir is also hooked up and installed. I still need to work on the rack though.

Going to try and finish up the wire harness next weekend, Lots of shrink tube and soldering. :)

Saturday, July 26, 2008

Wire harness..


So I was looking at my harness and trying to figure out what I wanted to do. So figured hey need to find out what wires got smashed in the wreck. Few need to be fixed but overall look good.

I also took out the AC connectors since I will never be putting that in. :)

Also got the motor mounts bolted and had to re work the tunnel a bit and the trans mount. But the wire job is first. So I hope to finish it up in the next two weeks going to hide all the wires if I can. :P

Wednesday, July 23, 2008

MOTOR is IN!

Well here we go on another installment, I figured I would give myself a B-day present and put the motor in.

At last got the pump in and the mods done and put the deep sump pan on, Looks sweet!
Before mating the trans and motor together I put the 3500 stall converter in, and filled it with 3 quarts of trans fluid before installing.
Slowly dropping it in. It seems like I made a ton of room in the tunnel for the bell housing. I now will be able to reach up and take the trans bolts out by hand easier than the 4ft of extenders on a 3/8 drive. The main goal was to have easy access to trans and motor area with out tearing the whole thing apart.
I think it took about 15min to Jockey it in. It has been a while but only few concerns but will take care of that later.
That pan is hanging pretty low. its bit lower than my cross member so might have to make some adjustments to make it fit little closer to the tunnel.

It seams its about 2 inches lower than the front cross member not too bad, worth the extra 2 quarts for sure and the finished product is sweet!
I think things are going to move a bit faster now. going to work on the power steering pump lines and trans cross member. I don't know if I will do a tube one or not depending on how much room I have. Will post with in the next week I hope with updates.

Friday, July 4, 2008

Finally progress

So after saving up for a few months and partial birthday , aniversary , fathers day, I was able to get this Hughes Aluminium deep sump pan. I really did not want to make one and the finished product in the end would be much nicer.


As in my last post the parts I needed to put in the pump tube came with the converter. I was a little nervous about drilling the holes but it was not as bad as it seemed.


The only problem so far was getting the front pump out. So called up my brother John and he walked me through pulling it out.


Once it was out, got to drilling. The drills supplied are just the right size so everything fit good. I did add some JB weld to the connections to make sure it does not leak as suggested on the Turbo Buick site.


Here is the five disk 3600 stall Vigilante converter that is waiting to go in after I get the trans back together. Then mate the trans and motor and put the motor in. The reason I went with a five disk. First they are suppose to handle about 1200 hp and second the ability to lock it up at WOT!

Almost forgot, I put a new belt on and fixed the bent alternator fins from the wreck. I used some dial calipers to set the fin distant, yeah with in couple thousands. I am a nut when it come to finished product.

Got the MSD rev limiter plate on too. Had to go get some bolts as its 3/4 thicker than the stock setup. I might have to mod the fire wall to make it fit but, not a big deal.

This box will allow me to have a 2 stage rev limiter. Five pounds + of boost on the line. This plus the the 3600 stall, I can not wait to see how this thing screams.

On a side note, we just got a new tube bender at work. So I am going to put a 8pt cage in. If I can just get the main hoop done, that is the only part that I really need the bender for. Till next time :P

Sunday, May 4, 2008

Well getting the tranny ready for the pump tube

So I got it on a stand. It was not easy to do as I did it by myself with a jack. :)


My friend lent me his motor stand. This is the only way to work on a trans. Its up off the floor and you can keep it bit cleaner when you tear into it. I am little bit chicken when it comes to this so it going to wait.

From what I am gathering on the instructions you pull this pump cover off and then you have to drill 2 holes in the front pump. I have read few other people have used JB weld to make sure it does not leak.
The fitting on the top right is supose to restrict the return line going out of the trans. I am not sure I want to put that on though. Its recommended by PTE to run the vigilante 5 disk lock up converter.
All this work just to be able to lock this think up at WOT. It should be good for 2 tenths in the 1/4 though.

Saturday, April 12, 2008

Paint in the engine bay!

So I cleaned and cleaned.

You can see multi colors all over


The hood was a mess had to hand clean.
Over all it looked good enough
Seems like it was time to call it a night.
Spent most of the morning painting. It did not turn out like I wanted but its done and done is done.

What to do next.. I am not really sure, the paint was holding me up last. I think I am going to tackle the trans next. I have to put a pump tube in for the Vigilante 5 disk lock up converter. After I get that done I will put the motor in. On the next post I will show the trans upgrade.

:P


Monday, March 24, 2008

Little update for today

I have not been doing much, just finished school and trying to finish up a few loose ends in the garage. I did pick up a 1990 244 volvo black interior and pass seat, and some black armrest from the local pick n pull. I waited about 3 weeks for the car to get into the yard. Not easy to find black interior.


I also started to strip the undercoating off the drivers fender with a little heat and scraper.


You can tell where I cut the blue car and welded it on to the front clip of the gold Bertone. I hope to start to move a bit faster. My goal for the next job is cleaning up the engine bay and have it painted.

Thursday, March 13, 2008

The new pile

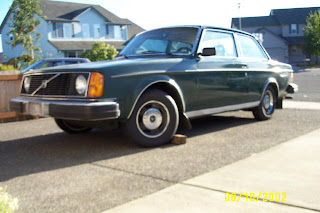
I had seen this car 5 years before and tried to buy it, but the owner would not sell. One day, while browsing cragslist, I found it. I decided to go look at it. They wanted $1500.....no way. I knew the owner, and we settled on $750. The car had a rebuilt tittle, which was good for me. I hate cutting up rare classics. They only made 6,622 of these cars from 1976 -1980. So, with that , I sold the rims for $100, and the front end for $200. I scrapped out the blue car. The total was $450 after I sold parts off the car. I could live with that.

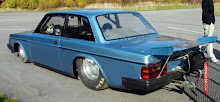
I saw the pictures above a few years ago and thought "that would be a sweet drag car."

The interior of my new pile was tan. It was not in very good condition. However, that's going to change. I tore the interior and almost all the wiring out in the car.

I plan on doing a very good wire job. I have been hunting Ebay for sometime for some nice half price or lower buys.

Very nice products. I did not want to cheap out on the wire at all. That's why I got the good stuff.

This is where the front clip ended up from the blue car. The front of the car did not have a good repair job, but I fixed that as you can see.

I had changed the front crossmember for the second round, added some support, and 1/2 more clearance on the oil pan.

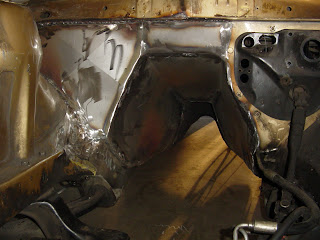
Volvo fire walls have bolt in panels on both sides. I cut the whole side out and rewelded a fabbed part I made. The tunnel area is a lot bigger than the stock area. This will make it easier for access if I have to drop the trans ever.

Monday, March 10, 2008

So on with the next pile of junk.

So, I settled out on my car, paid some bills off, and bought a few goodies for the next round. I found the car I thought I was going to do the 2nd swap in.


I worked a few weeks on it. I stripped the interior and re-did the tunnel and fire wall. The care was clean and strait, no rust. I also did a mini tub in the rear, which would have worked out very well. I also have to thank, Adam, my little brother for all the help on that little job.
As you can see here, it's underway..... heading for the fat motor install. But low and behold...

What is that doing on a trailer, with the front clip missing? I would like to ask my self the same thing. Adam was very upset that he helped me with the mini tub and the car ended up at the scrappers without a second thought. My wife, at this point, did not know what to think. I was crazy. Buying a car and then throwing it away with all that work into it. I would like to point out that I was crazy to buy the motor in the first place without telling my wife. I think I was pretty brave to buy another car. The car of all cars will be in the next update to the story.


Thursday, March 6, 2008

The Project

This is going to be just a fast update about where I am with my faithful project. So, this all began back in 2000. I had made the mistake of finding a Grand National motor and trans in L.A. My brother, John, had happen to be going there the next day. To make a long story short, he said I would be crazy to pass this up. I would also like to note that I was crazy to take it too. I had the motor and trans shipped to work. One other side note, my lovely wife had no idea what was coming home.

So, it began. I stripped the motor down and began to clean it up. I bought a few new parts and painted the motor.


At this time, I did not have a car to put it in, but I found a 1980 242 2 door Volvo with a blown motor for $200. It ended up being a year or so later when this showed up.


I didn't really know where to begin, so I looked at it for some time, until I got tired of looking at that nice motor sitting on a stand in my garage. If you look at something long enough its bound to give you the itch. I started to tear into it.


At this point, your thinking "Man that is a lot of work to just get it ready." I am only going to post a few more pictures so you can see what kind of work is involved before you tear into something like this. I have been welding for 12 years, and I know my way around a fab shop, so I had just a little hint of what was to come.

I had the engine bay painted and the cross member set up.


The motor went in for fit up just to make sure. Now mind you, there is a lot of in-betweens here that I am passing up to save on your reading time.


After that, it was just a matter of tubing and wires, etc.
And the finished product.....


Here are a few pictures I took of it finished with rims about a year later.


I also ended putting in a ford 8.8 rear end with ford 9" barrings and Ford F-150 12.5 break drums.

I also boxed the lower control arms too.
Here is a video of my run at the track. I would like to add that I had a burnt converter, and my slicks were rubbing on my fenders down the track.


Here is my time slip for the run. Twin turbo diesel truck, a close run for sure.


Last year I totaled the car doing 35 mph on a nice sunny day.

Believe it or not, the motor and rims were okay. I managed to save most of the car.
You can see from this engine bay picture that everything was pushed back just a little.


Here is the last front end shot.

That is all for now. I will be continuing the story. This seems like a good place to stop.
On the next posting, I will tell about what I picked up for a rebuild.